Elevate Your Patio Project with DIY Pro, Shannon Quimby!
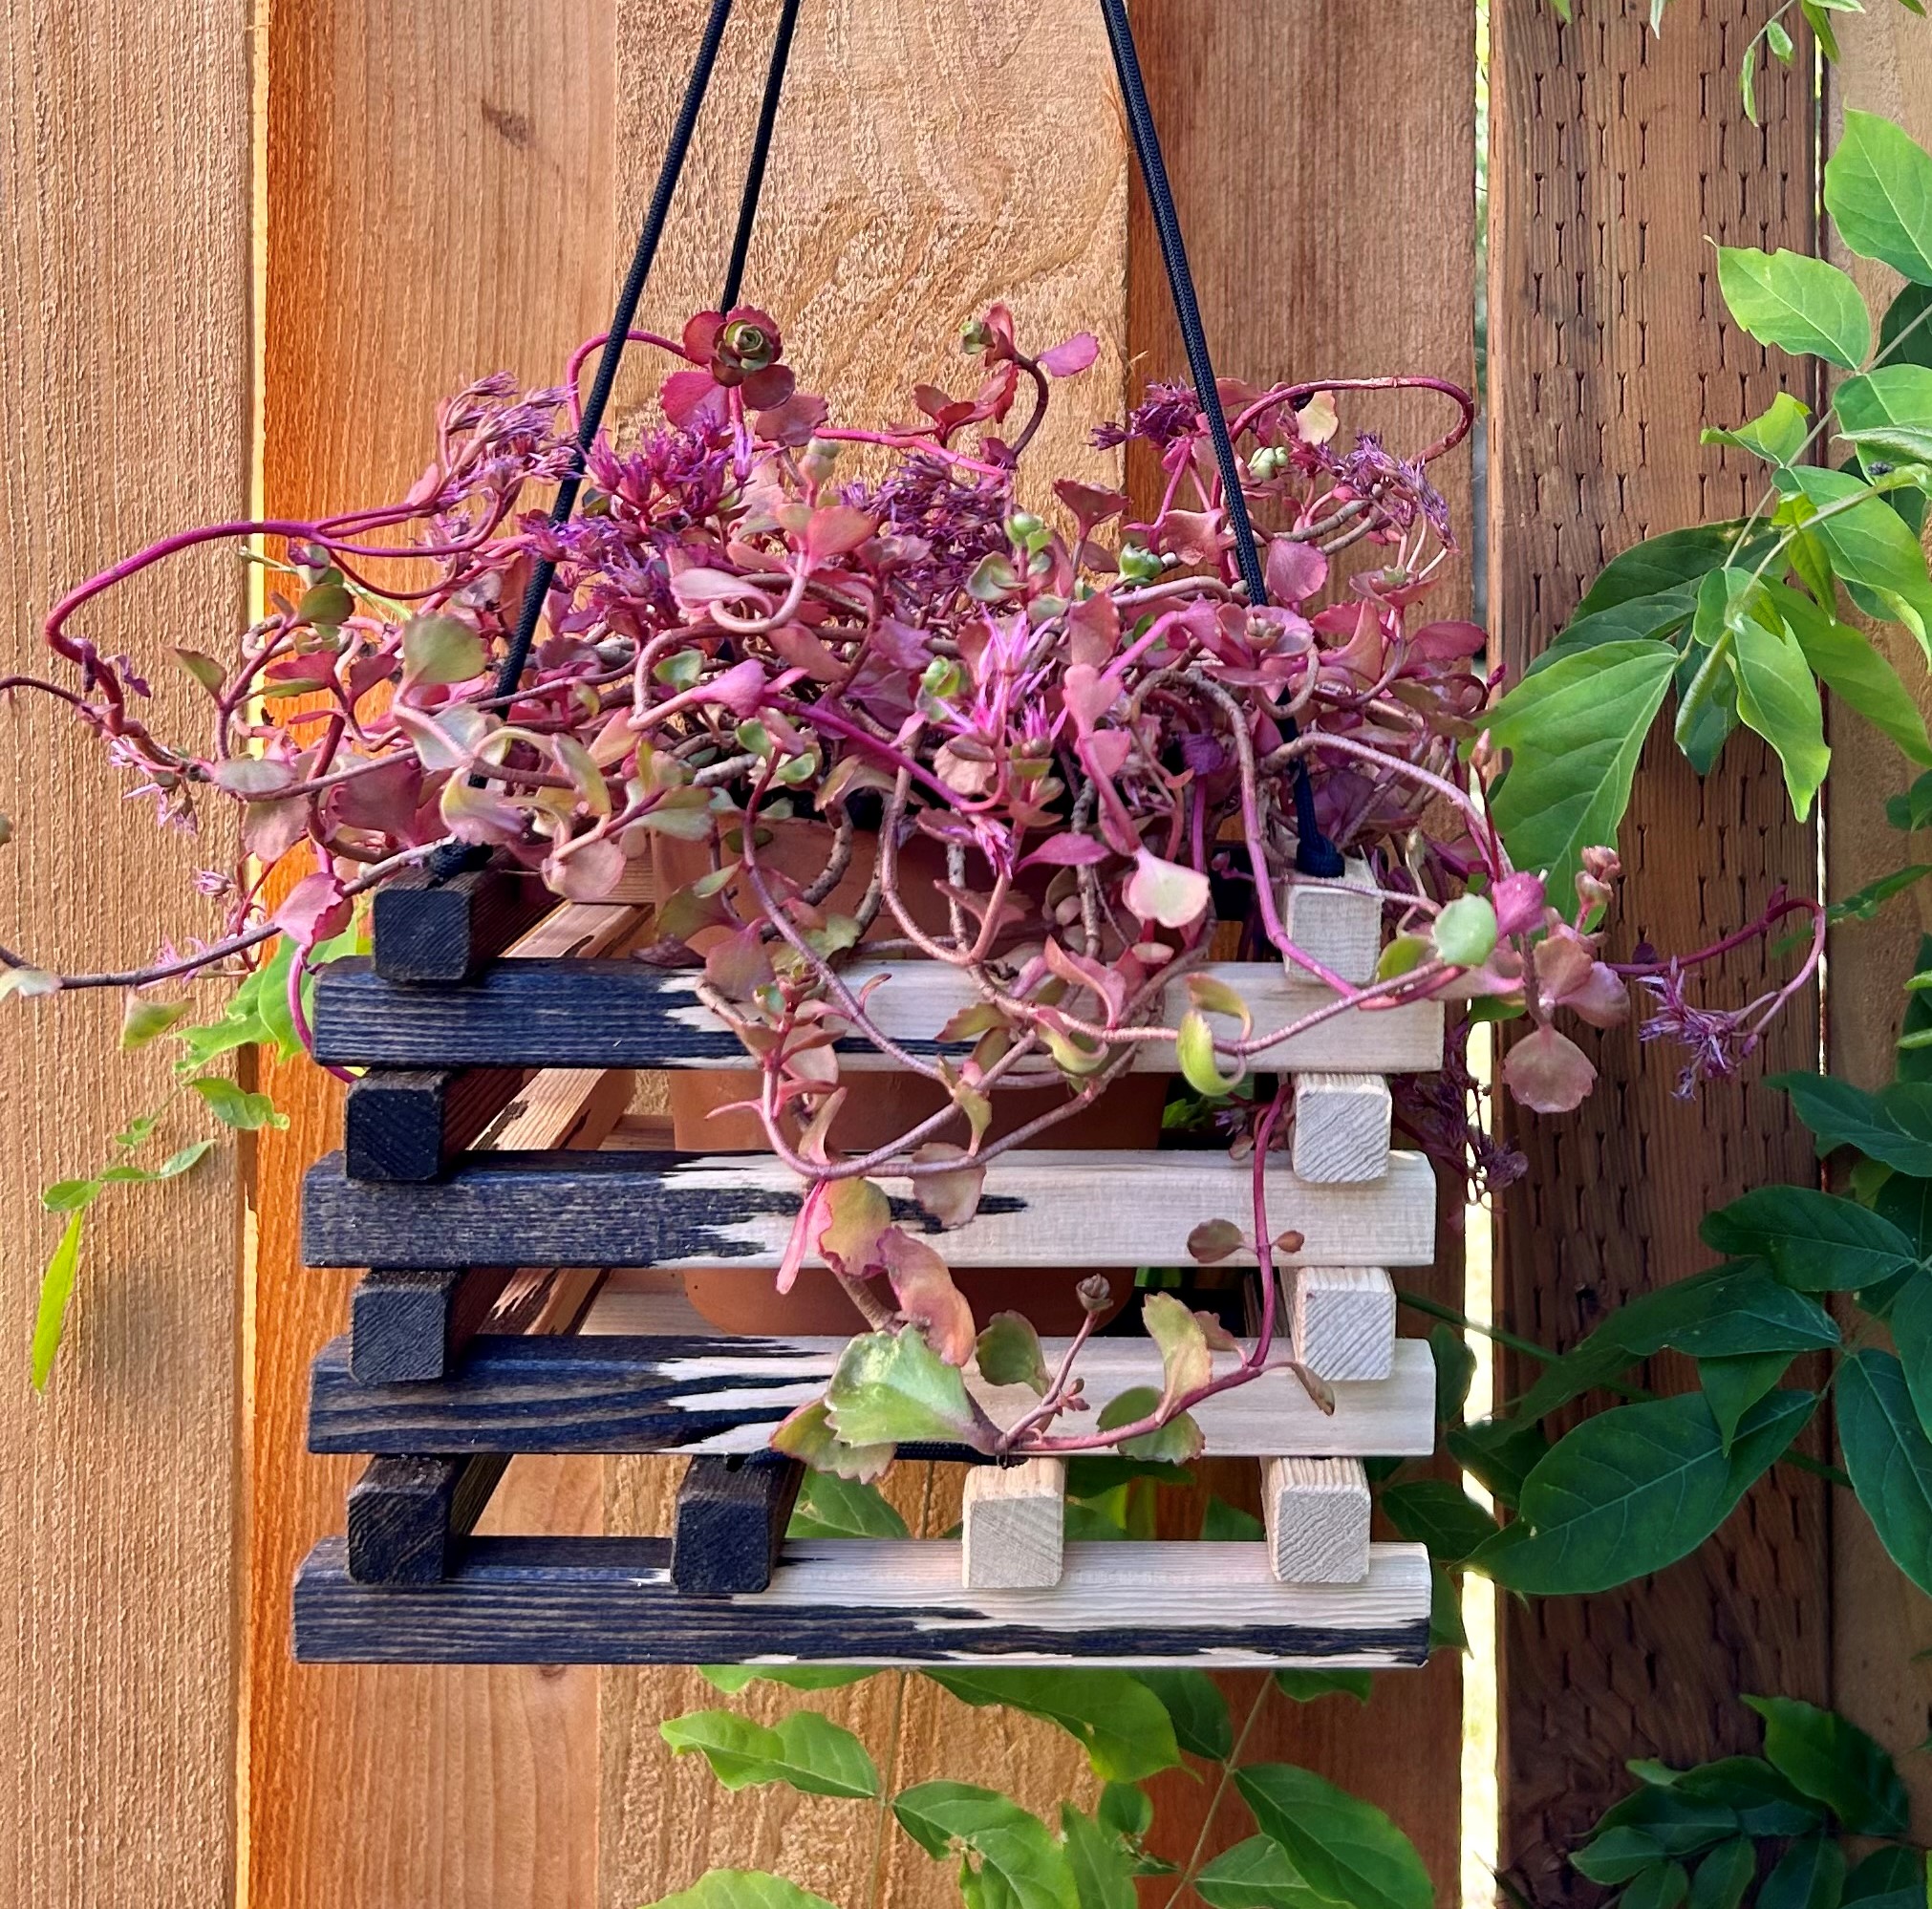
We teamed up with the incredible DIY expert Shannon Quimby to bring you a stunning DIY Wood Slat Hanging Planter that will elevate your patio to new heights! 🌱 But wait, there’s more! Shannon generously donated these beautiful planters to Habitat for Humanity in McMinnville. 🏡
Ready to get your hands dirty and create something amazing?

Supplies needed for this project:
- 12 ½ ft of 1/2” wooden square dowel rod
- Miter Saw
- Tape Measurer
- Pencil
- 150 grit sandpaper
- Rag
- 8oz can of dark stain
- Drill
- 9/32 drill bit
- Scissors
- Painter’s tape
- 8 ft of 5/32” nylon cord
- Potted plant
How To:
1. With the miter saw cut the dowel into 18 pieces, 8 inches long
2. On one side of each dowel, measure and mark 1 inch in, end to end
3. Drill two holes through the marks, creating two holes, one on each end
4. Grab two dowels that have two holes and on the same side, measure, mark drill two more holes so all
four holes are equally apart
5. Sand the edges and holes and wipe off dust
6. Dip one end of each dowel all the way to the bottom of the stain can. Lift it out slowly letting the stain
drip off
7. Stand the dowel on a flat surface so the stained part is the top, letting the stain naturally drip down the
sides
8. Repeat step 7 with all the dowels and let sit for 15-20 minutes
9. Wipe off excess stain and let dry
10. Cut two pieces of nylon cord, each 4ft long
11. At an angle, twist a piece of painter’s tape around each end of cord so when it’s all wrapped it looks
pointy on the ends
12. Place the two dowels with four holes, parallel to each other with one dowel having the stained end facing
one direction and the other facing the opposite
13. Stack and cross on top of the two four-hole dowels four two-hole dowels so the holes line up with four
hole dowels and the stained ends together
14. Starting at one corner and from top to bottom, thread the nylon through the dowels and then along the
length of the four-hole dowel, alternating bottom to top, top to bottom, and then bottom to top
15. Stretch and adjust the cord ends so they are equal.
16. Repeat steps 13 and 14 with the other four-hole dowels and the ends of the four two-hole dowels. This will
secure everything together
17. Continue stacking and threading the dowels along all four corners, alternating each one at a time, making
sure the dark stained portion of all the dowels are stacked together on two corners
18. Once all the dowels are in place, pull each corner cord taunt and tie a knot as close to the top of each
corner dowel. This will tighten the whole piece
19. Gather the cords at their ends and tie them into a knot, adjusting each so the planter will
hang level. Cut cords close to the knot, place the potted plant inside, and hang the planter
Final materials at any of our PARR Lumber locations: https://parr.com/locations
#WoodSlatHangingPlanter #PatioProjects #DIYProShannonQuimby #HabitatforHumanityDonation #diy #homedecor #trending

